Using Menu Anchor in WordPress Menu
In our themes you can simply create a one-page scroll navigation. In other words by clicking on an item in menu navigation you will navigate to a specific section from the current page.
The Menu Anchor widget allows you to create a page with an internal smooth scrolling navigation.

To add a Menu Anchor to your layout and scroll to a specific section of widget after clicking on a navigation menu item you have to:
- Add the Menu Anchor link widget to the top of the widget or section which you want to scroll to it in Elementor.
- Insert the Menu Anchor’s name to a WordPress menu custom link.
Adding a Menu Anchor widget in Elementor:
- Add a new page or edit an existing one.
- Click on Edit with Elementor button.
- From the Elementor’s left dashboard, drag and drop the Menu Anchor widget into your layout and at the top of a widget or section which you want to scroll to. A new panel will open on the left side of the Elementor with the element’s specific settings.
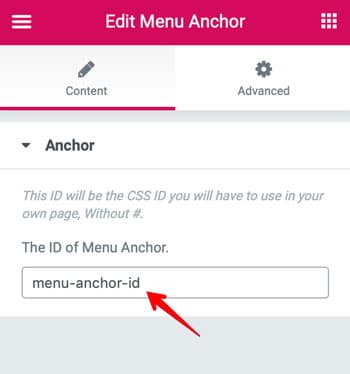
- Insert the anchor’s name in the The ID of Menu Anchor field. That is the ID of your Menu Anchor which you have to reference the link field to. For instance we name it menu-anchor-id.
- Update the settings.

Anchor’s Name should be only in English.
To add an anchor’s name to a WordPress menu item:
- From the WordPress menu, go to Appearance → Menus.
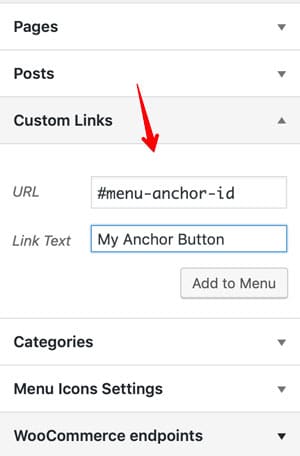
- Create a custom link. Give it a name and set its URL to the anchor’s name. (Don’t forget to add a “#” prefix before the anchor’s name)
- Add this custom link to your menu.
- Save the menu.


