
Creating Your Own Custom CSS via Inspect Element
Most of the user queries that we receive, either in the forum or via mail are related to simple design tweaks like changing the color, font-size which requires custom CSS. Custom CSS can be added in your WP site through different methods but what can be easier than pasting the code in a box Additional CSS provided by the WordPress itself, since Version 4.7.
The browser development tools allow you to access many useful inspection features like real-time CSS customization, or the javascript debug console. Simply hit F12 on your keyboard and you’ll access this interface.
The following tools are generally launched by hitting F12 on your keyboard:
- Recommended Chrome DevTools
- Firefox Firebug
- Safari has Web Inspector (which you switch on in the menu with Safari → Preferences → Advanced → Show Develop menu in menu bar). Simply right-click and select Inspect Element to launch it.
- F12 developer tools in Internet Explorer
For every element on your page, it quickly and easily shows you which CSS rules (and files) are responsible for the styling. You can work out in seconds how to change the styling of any element.
Creating a custom CSS code is quite straight forward, if you are familiar with the basics of HTML and CSS. The sole purpose of this article is to help our users who have the required knowledge and are interested to write the code for themselves. So lets move along with doing the same by following the steps below:
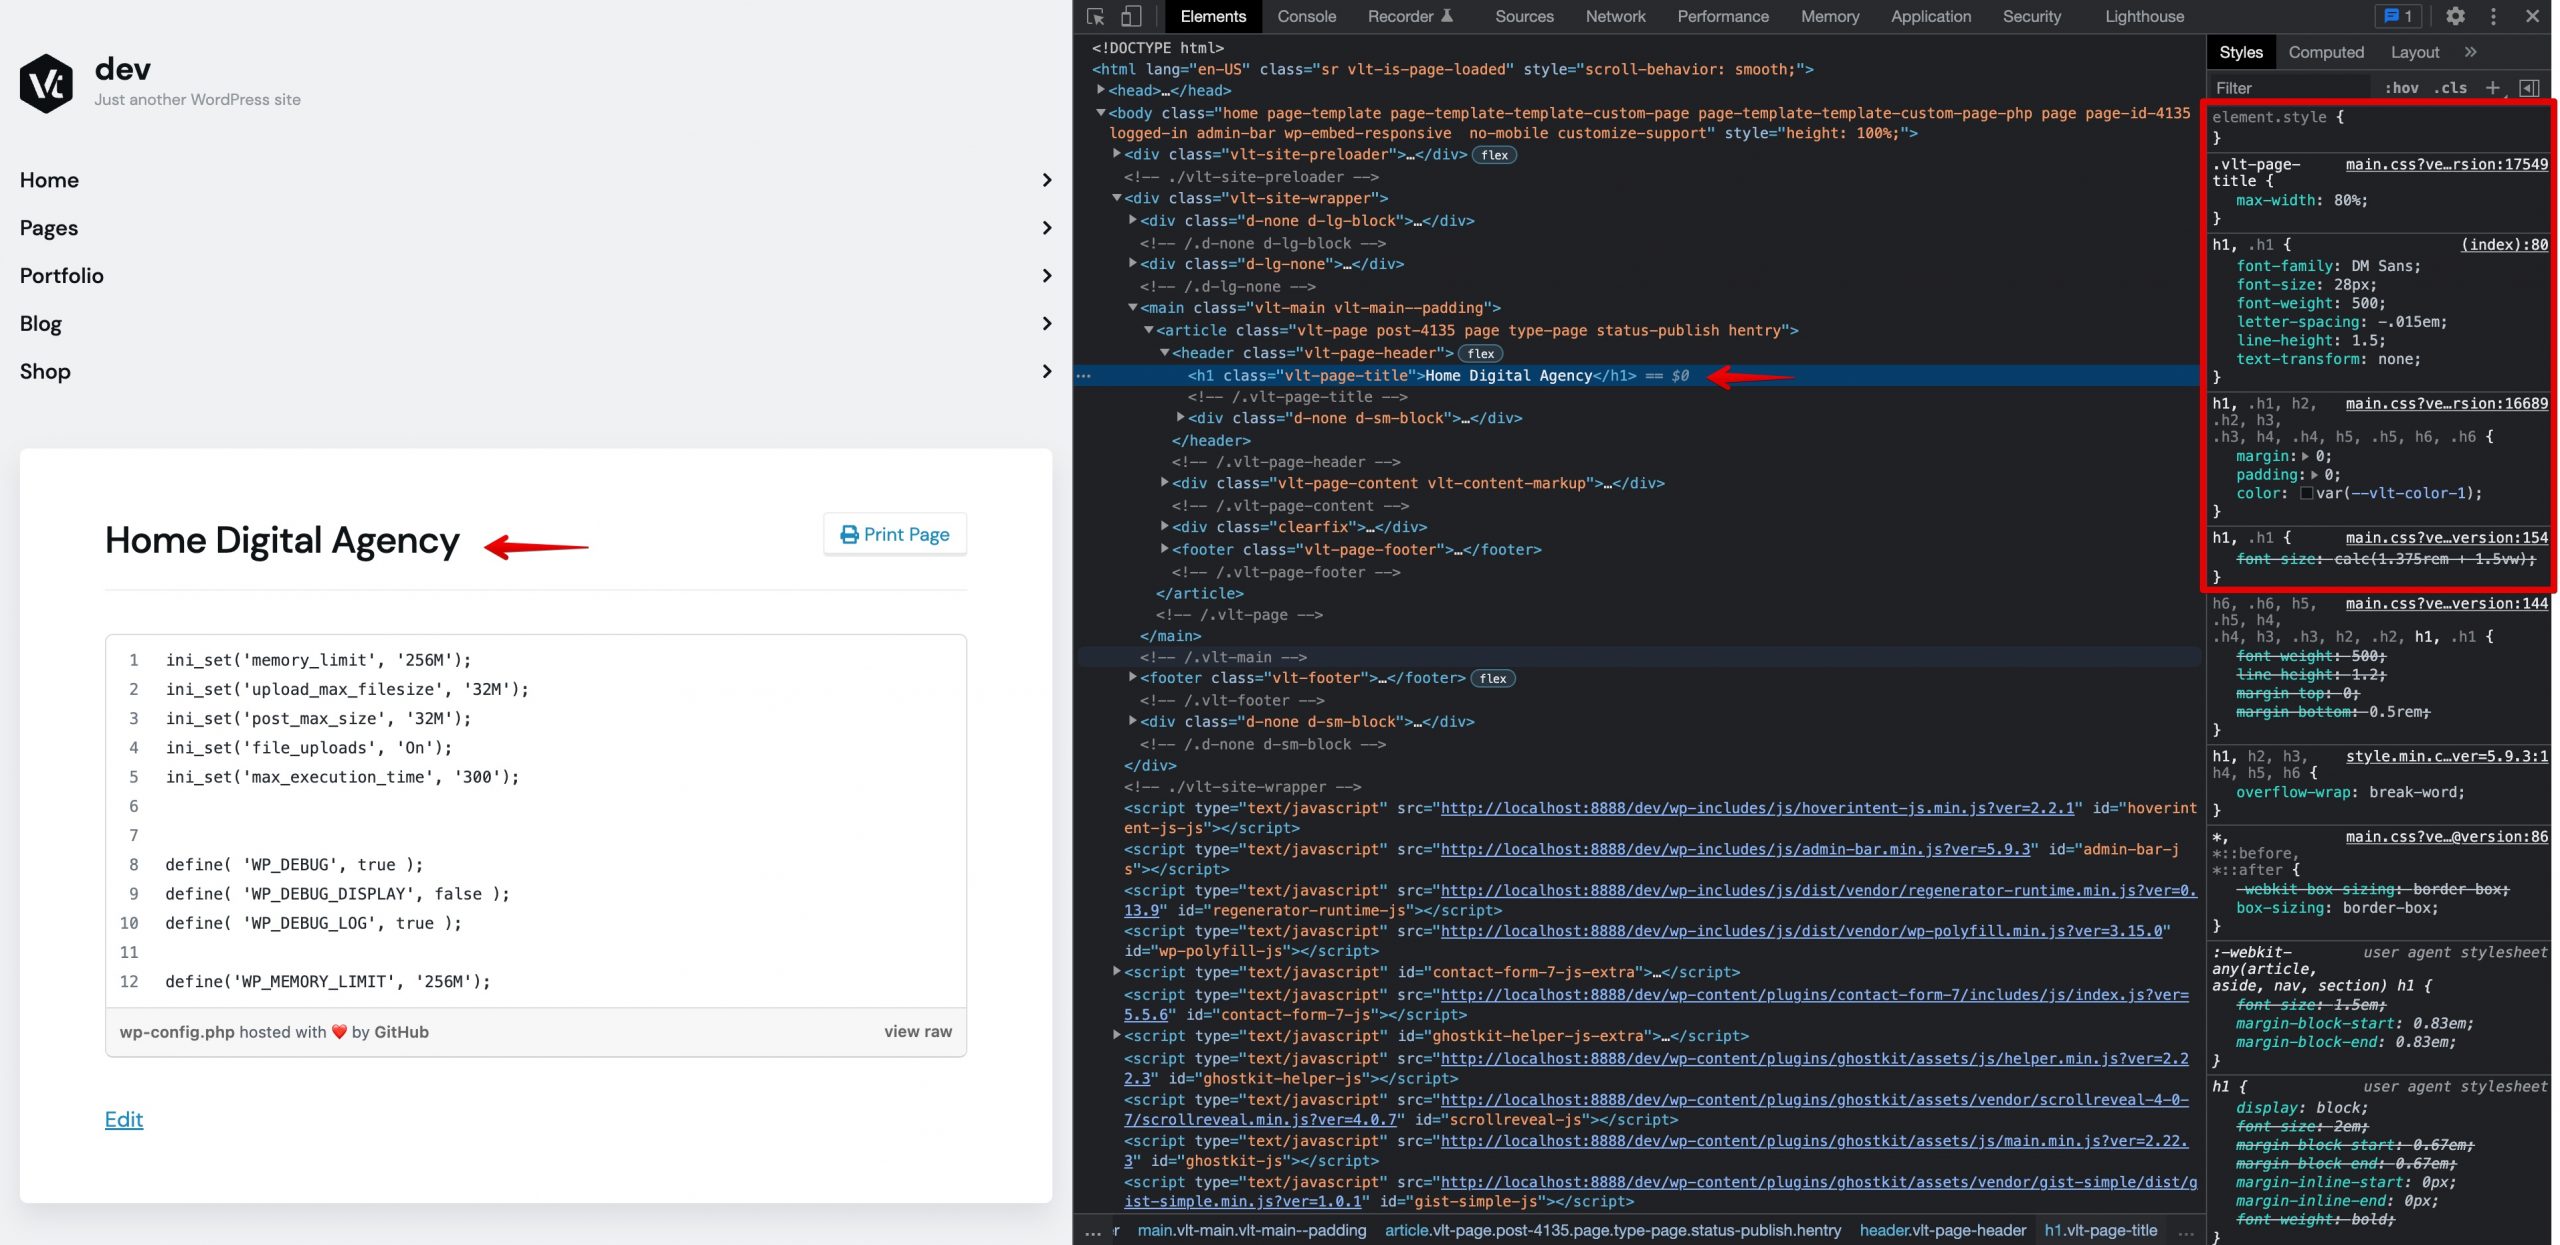
- First in your site hover over the element for which you want to write the CSS, right click on it and then click on Inspect Element.
- Now, docked at the bottom, you will see the HTML of the site and to the right of it you can see the CSS related to the selected HTML element (classes and IDs).
- If you have selected the desired HTML element then most probably its styling (CSS) can be seen on the right side, now if you want to change the existing style then you can just change the values as desired.
You can see the changes in your website as you change the values (CSS codes). - And if you want to provide completely new styling to the selected HTML element then you can click on the + icon on the CSS section and then you can write the desired CSS inside the generated target class/ID. However. the HTML class/ID generated by clicking the + icon may be not be precise enough to target the desired element so you may need to add the additional classes or IDs before the generated class or ID.
The additional classes or IDs can be copied from the elements wrapping the desired element and one thing to remember here is that before the class a (.) dot needs to be added and a (#) hash before the ID.
At last after you have got your desired CSS code you can copy and paste it in: Appearance → Customize → Additional CSS and then hit save to view the permanent changes.